Ecbot MCP Server
Connect Claude Code, Codex or Cursor to your workspace with an API key, so an AI assistant can manage your agents, knowledge, chats and customers.
The Ecbot MCP Server lets an AI assistant such as Claude Code, Codex or Cursor work in your workspace. Connect it with an API key, then ask in plain words: "list the chats that need me", "add our new return policy to the knowledge base" or "tag this customer VIP". The assistant can do what the key's creator can do in the app.
Create an API key
The workspace owner and members with the built-in Admin role can create API keys. Custom roles can't. Open the workspace menu at the top of the sidebar, choose Settings (members choose the workspace name), then open API key:
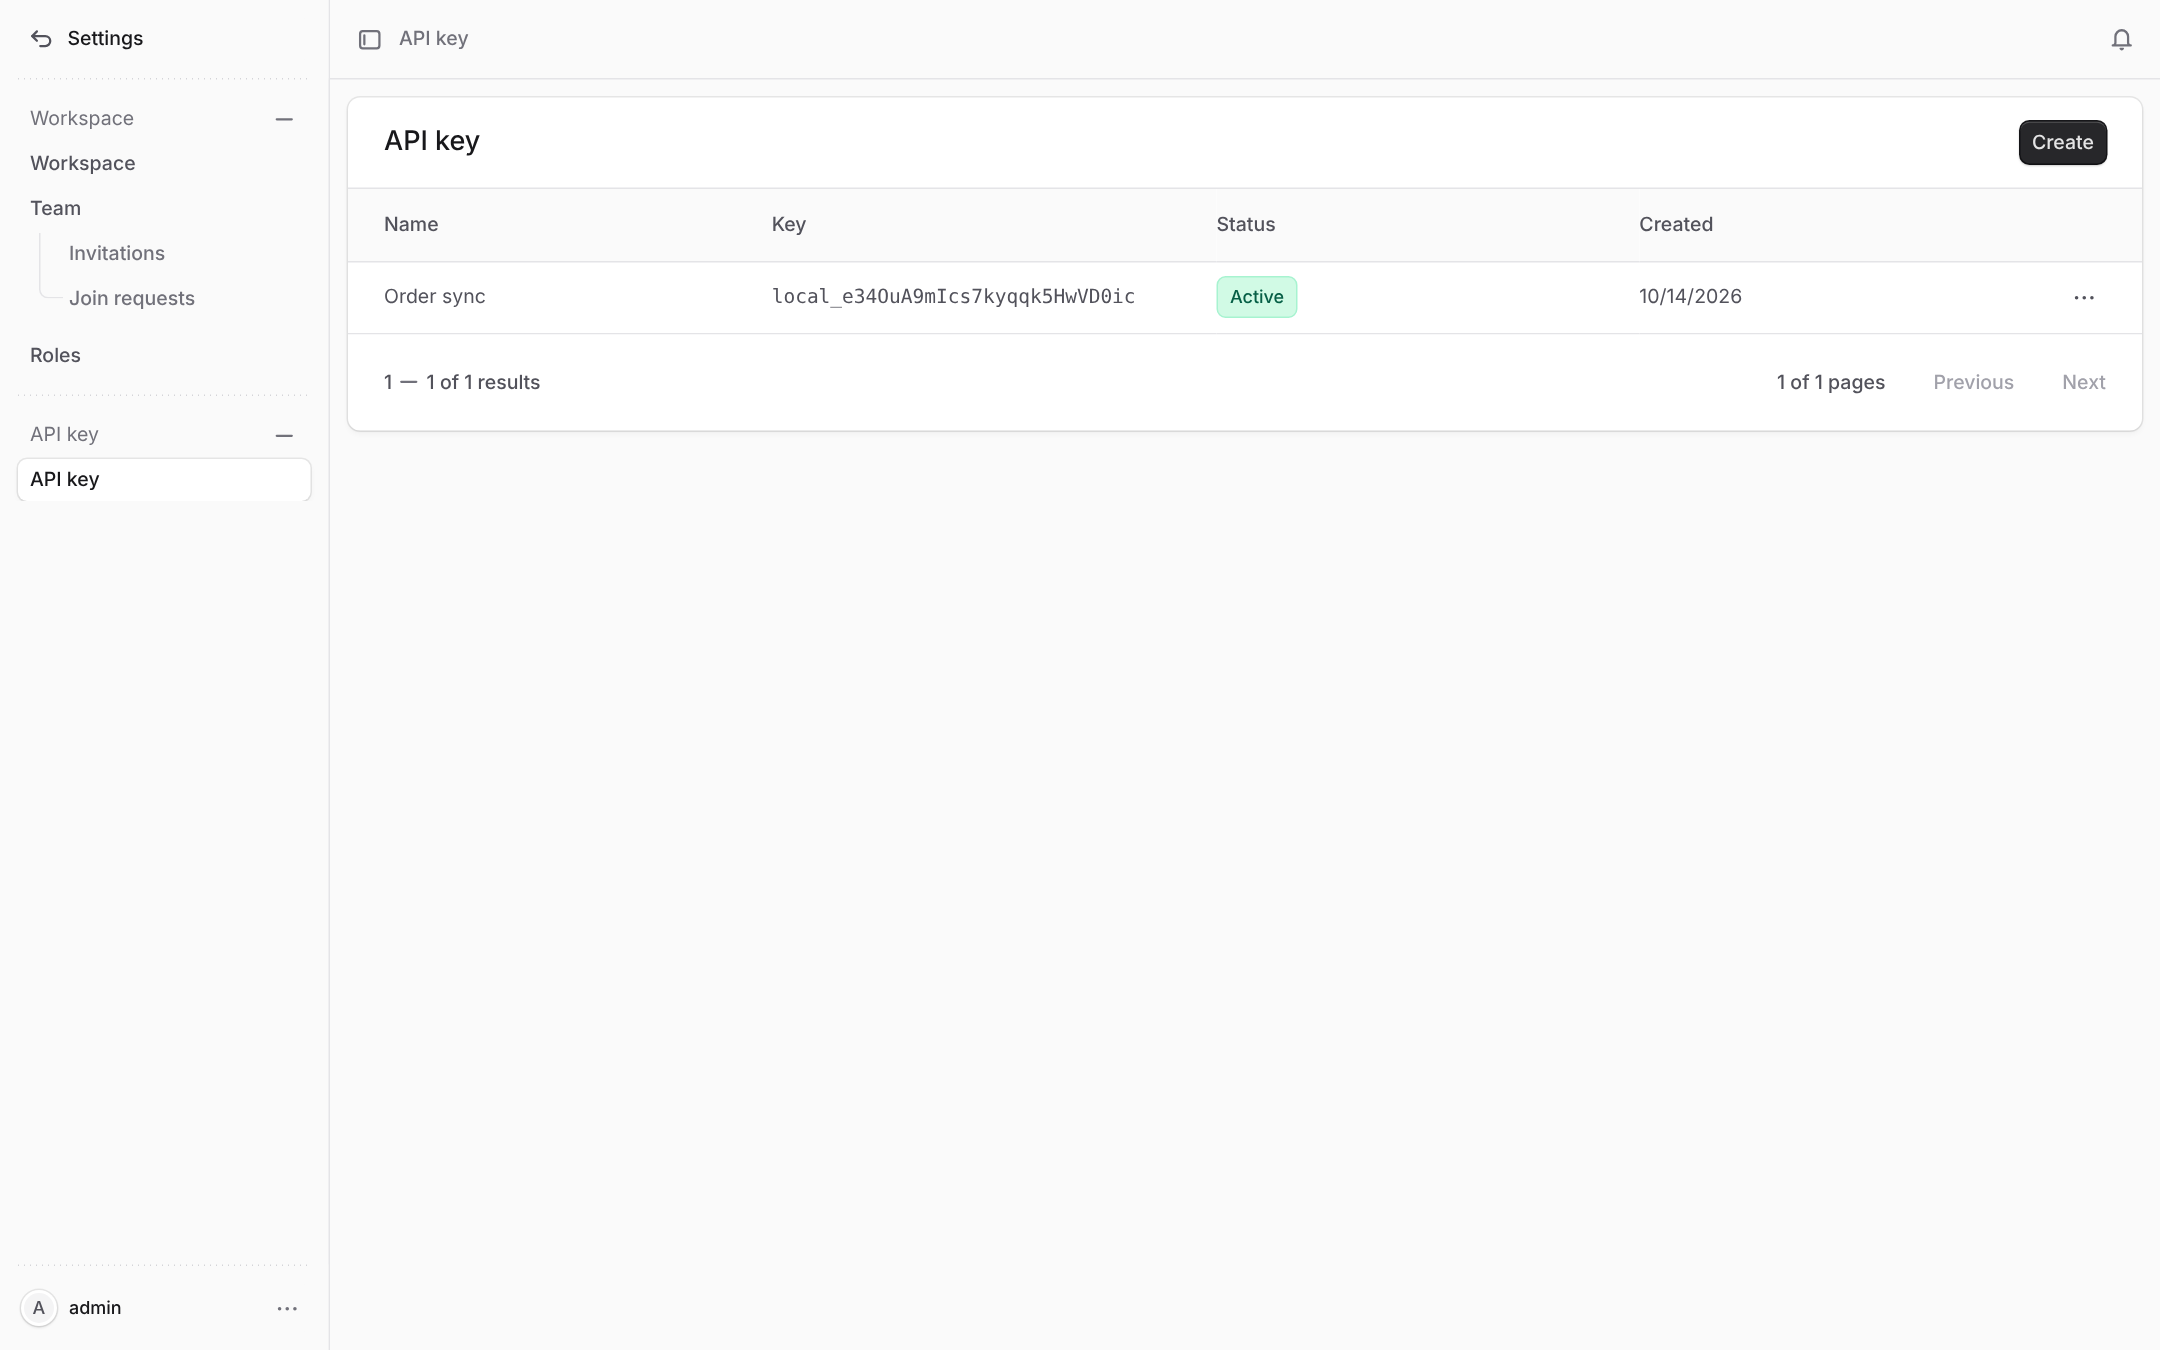
- 1API key in the settings sidebar lists every key in the workspace.
- 2Create makes a new key.
Choose Create, give the key a name such as "Claude Code", and choose Create again. The new key appears once:
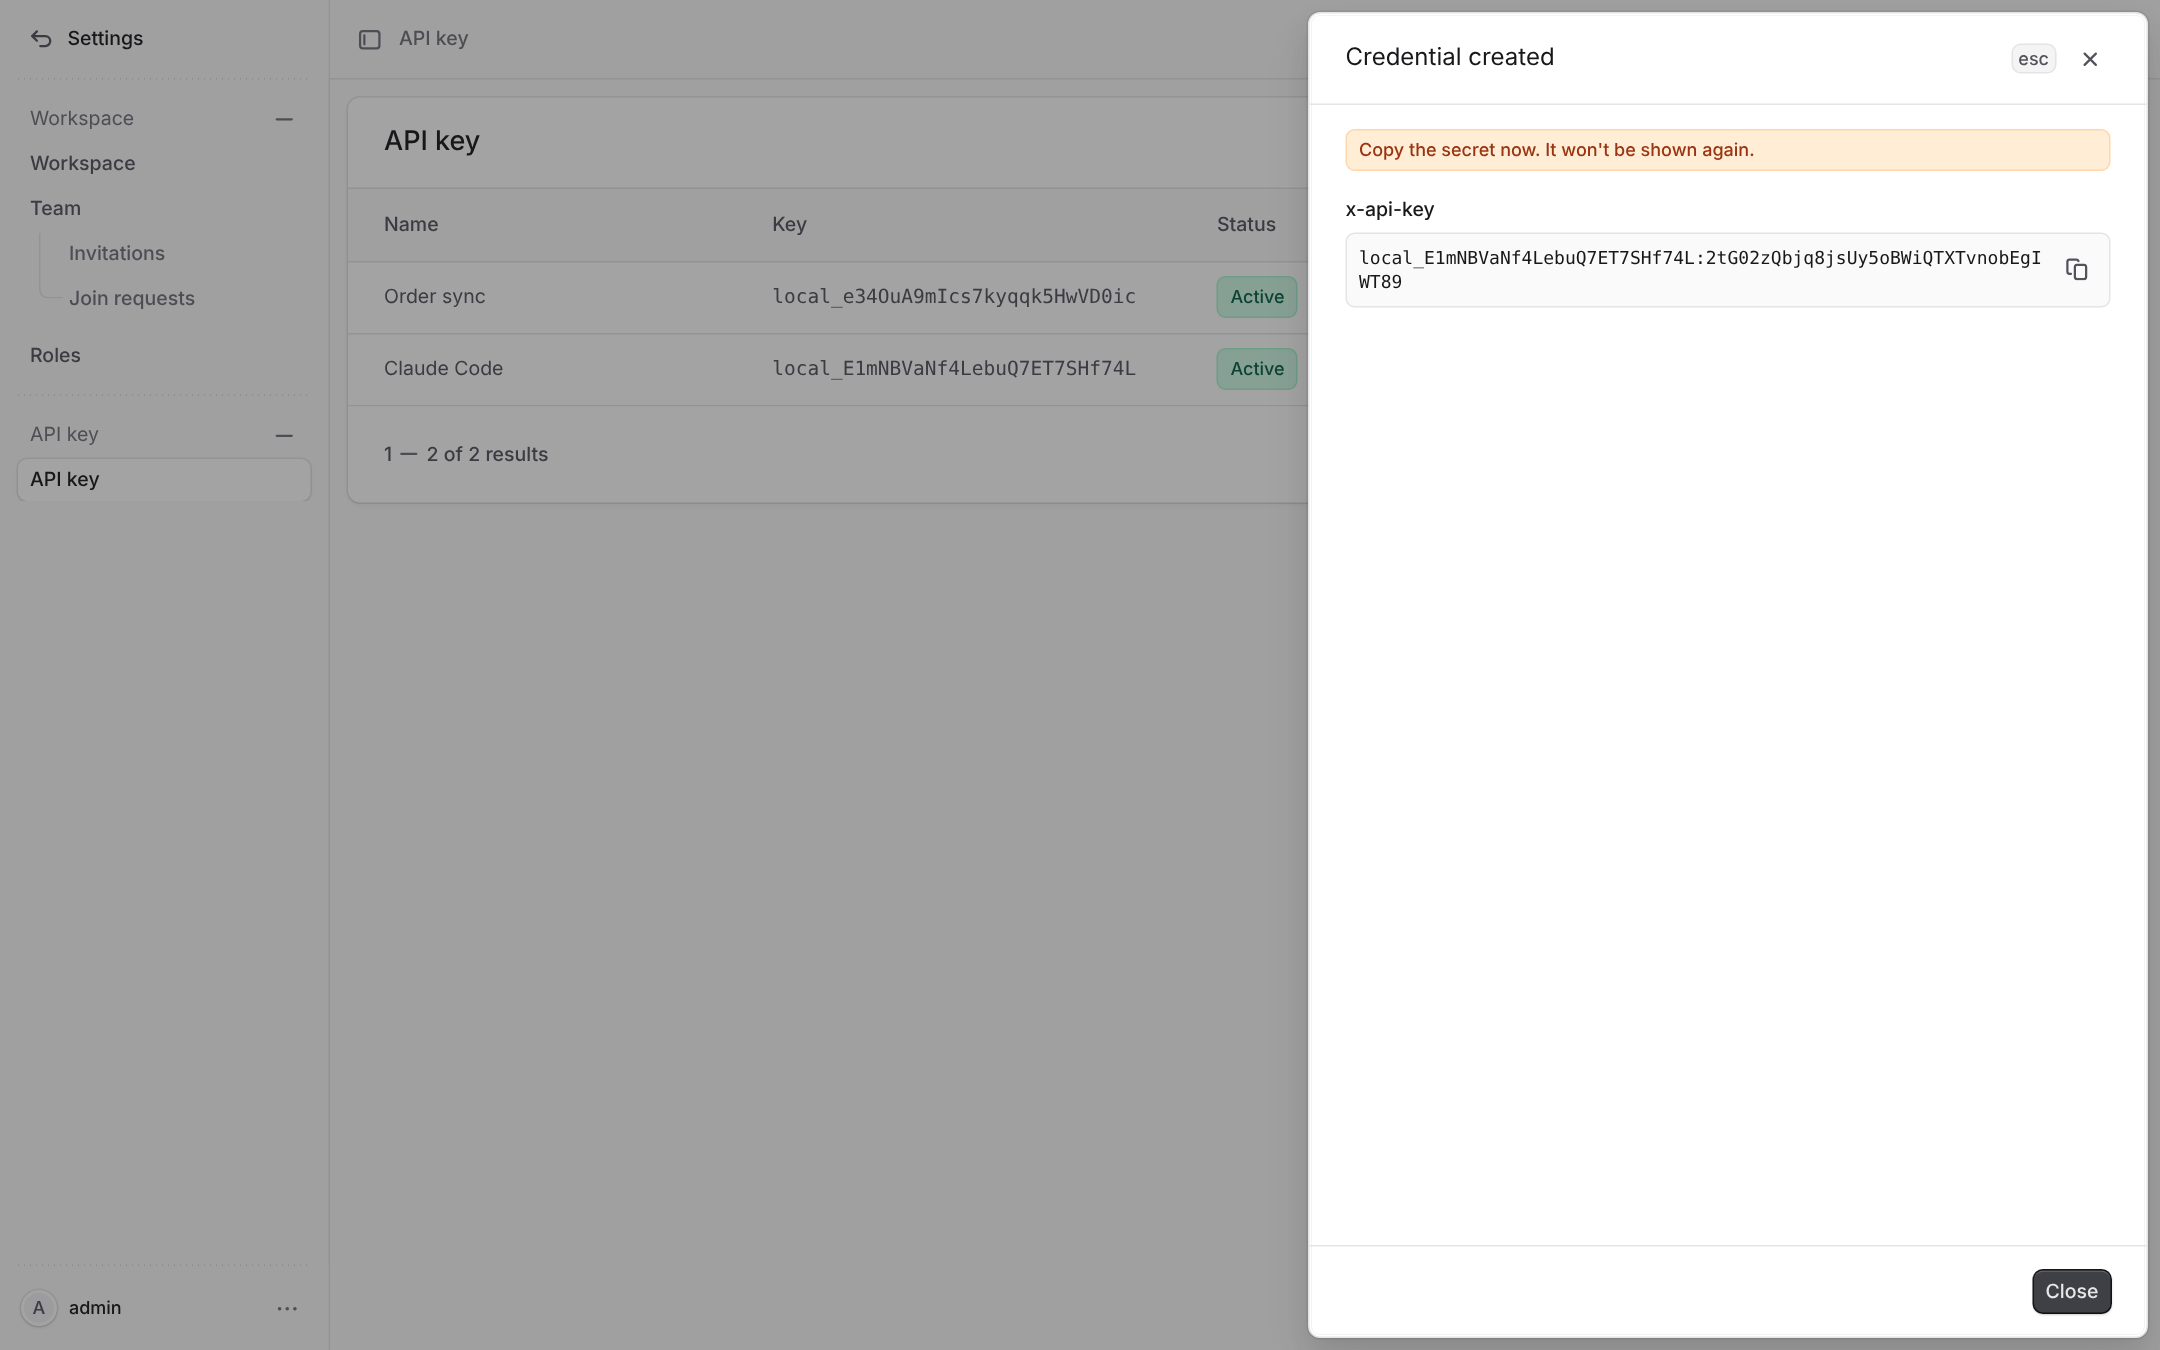
- 1The secret is shown only this once. If you lose it, rotate the secret or create a new key.
- 2Copy the whole value under x-api-key. This is the key your assistant sends.
If a key leaks, open its menu (...) and choose Rotate secret: the old secret stops working right away. Delete revokes the key for good.
Connect your assistant
The server address is https://mcp.ecbot.dev/mcp. Your assistant sends the key with every request, as an x-api-key header or as a bearer token. Replace YOUR_KEY below with the value you copied.
Claude Code
claude mcp add --transport http --scope user ecbot https://mcp.ecbot.dev/mcp \
  --header "x-api-key: YOUR_KEY"
Codex
export ECBOT_API_KEY="YOUR_KEY"
codex mcp add ecbot --url https://mcp.ecbot.dev/mcp \
  --bearer-token-env-var ECBOT_API_KEY
Cursor and other clients
Clients set up with a JSON file, such as Cursor's mcp.json, take the address and a header:
{
  "mcpServers": {
    "ecbot": {
      "url": "https://mcp.ecbot.dev/mcp",
      "headers": { "x-api-key": "YOUR_KEY" }
    }
  }
}
Keep a file that holds your key out of shared folders and code repositories.
What the assistant can do
| Area | Read | Change |
|---|---|---|
| Agents | List agents, read one, list the AI models | Create, edit, activate or deactivate, delete |
| Conversations | List chats, read one and its messages | Reply, turn the agent on or off in a chat, mark Open or Resolved |
| Knowledge base | List knowledge bases and their items, read an item | Create a knowledge base, add text or web page items, edit, process or delete an item |
| Customers | List customers and tags, read a customer and their tags | Edit a customer, create, edit or delete tags, tag or untag a customer |
| Tools | List the workspace's tools and an agent's tools | Create an HTTP or MCP tool, edit or delete it, turn it on or off for an agent |
| Skills | List your skills and the templates, read one | Create a skill, copy a template, edit or delete it, attach it to an agent or detach it |
Uploading files, installing marketplace apps and permanently erasing a customer's data are only available in the app.
Build skills with your assistant
The assistant can write a skill as steps, with branches, your tools and the built-in actions: hand off to staff, notify the team, add or remove a tag, schedule a follow-up and save customer info. Describe the procedure in plain words, for example:
Create a skill "Order status" for when a customer asks where their order is. Ask for the order code and call my Order lookup tool. If the order is late, say sorry and hand off to staff. Otherwise tell them the delivery date. Attach it to my shop agent.
The assistant can look up your tools and tags first, so the steps point at real ones. Open the skill in the app afterwards to check it. More prompts are in the cookbook.
Add Ecbot skills to your assistant
Ecbot publishes skills that teach your assistant how to work in your workspace. Install them next to the server, and pick the ones you want:
npx skills add blackmouse572/ecbot- ecbot: the safety rules, such as asking before a reply reaches a customer, and where each kind of setting belongs.
- ecbot-agent-builder: sets up an agent, or cleans one up. It keeps Extra instructions to tone and a few rules, moves facts to knowledge, and turns each workflow into a skill.
- ecbot-skill-builder: turns a requirement into a skill written as steps, the way the tutorial does.
Permissions and the activity log
- The key acts as its creator. It always has the creator's current permissions: if they lose a permission or leave the workspace, the key loses it too.
- The assistant sees only the tools the key may use, so it does not try actions that would be refused.
- Every change is logged. Changes and replies show in Activity under the creator's name, as if they made them in the app. Opening a chat or a customer is logged as a view, the same way.
- Customer text is data, not instructions. Messages from customers and the text of your documents can say anything, so the server tells the assistant never to follow instructions found in them.
Frequently asked questions
What the person who created the key can do in the app, right now. Keys are created by the workspace owner or a member with the built-in Admin role, and both can use every tool on this page.
The key opens your whole workspace, so treat it like a password. Every change is logged under the key creator's name, and you can rotate or delete the key at any time in Settings.
It cannot upload files, install marketplace apps or permanently erase a customer's data. Do those in the app.
Yes, right away, as if the key's creator sent it from Conversations. Most assistants ask you to confirm before they call a tool that sends or deletes something.
Flag an unhappy customer
A skill recipe that calms an upset customer, tags them Complaint, fixes what it can and alerts your team about the rest.
Configuration
Every Ecbot app reads its settings from a .env file. This page lists the files, the variables that matter, and what pnpm setup:local fills in for you.